How to Make Delicious Mummy Cookies Fast
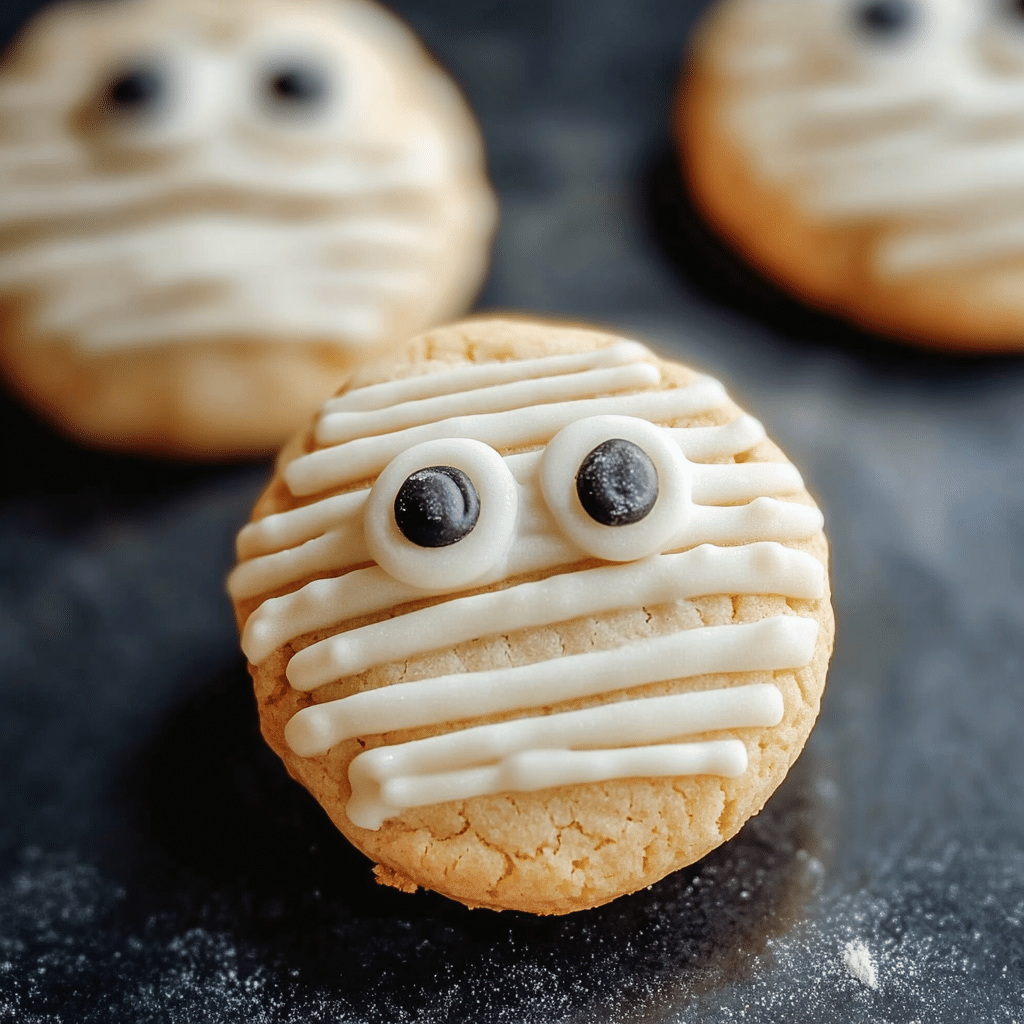
If you’re looking for a festive, fun, and lightning-fast treat this Halloween, you’re in the right place. These Mummy Cookies capture the perfect mix of spooky and sweet, making them an instant favorite for kids and adults alike. Whether you’re new to baking or a seasoned pro looking for a quick recipe, these Mummy Cookies are simple to whip up and decorate, delivering that classic mummy-wrapped look with delicious flavor in every bite.
Why You’ll Love This Recipe
- Super Quick Preparation: You can have your cookies ready to bake in under 15 minutes, perfect for last-minute parties or snack cravings.
- Kid-Friendly Fun: Decorating the mummies is a fantastic activity for little helpers, sparking creativity and holiday excitement.
- Delicious Flavor Combo: Soft sugar cookies paired with rich white chocolate ribbons and candy eyes make every bite a treat.
- Versatile and Customizable: Easy to modify with different toppings, flavors, or colors to suit your taste or dietary needs.
- Perfect Halloween Presentation: These cookies bring spooky charm to any party platter or treat bag, sure to impress guests.
Ingredients You’ll Need
The magic of Mummy Cookies lies in their straightforward yet flavorful ingredients. Each one contributes to the perfect texture, taste, and appearance, ensuring these cookies are as tasty as they are charming.
- Soft Sugar Cookie Dough: The base for your cookies, offering a sweet, tender bite that holds the mummy decorations well.
- White Chocolate or Vanilla Candy Melts: For the iconic “mummy wrap” effect, these melt smoothly and harden beautifully.
- Candy Eyes: Adds personality and a spooky touch to each mummy.
- Butter and Sugar: Essential for a rich, melt-in-your-mouth cookie texture if you make your dough from scratch.
- Vanilla Extract: Enhances the flavor with a warm, inviting aroma and taste.
Variations for Mummy Cookies
This recipe is wonderfully adaptable, so feel free to mix things up. Whether you want to try natural ingredients, different flavors, or accommodate allergies, these variations keep the fun and flavor intact.
- Gluten-Free Option: Use a gluten-free cookie base to make these treats safe for friends with sensitivities.
- Dark Chocolate Wraps: Swap white chocolate for melted dark chocolate for a richer, more decadent look and taste.
- Peanut Butter Mummies: Add peanut butter to your cookie dough for a nutty twist that pairs wonderfully with chocolate.
- Colorful Candy Eyes: Use different colored candy eyes for a whimsical, fun effect.
- Spiced Cookies: Add cinnamon or pumpkin spice to the dough for an extra autumnal flavor.

How to Make Mummy Cookies
Step 1: Prepare Your Dough
Start with either pre-made sugar cookie dough or your favorite homemade recipe. Roll it out on a floured surface to about 1/4 inch thick, then use a cookie cutter or a glass to cut uniform circles for your mummy base.
Step 2: Bake the Cookies
Place your cookie rounds on a parchment-lined baking sheet and bake according to the recipe or package instructions, usually around 8 to 10 minutes until edges are lightly golden. Let cool completely before decorating.
Step 3: Melt the White Chocolate or Candy Melts
Slowly melt the white chocolate or candy melts in the microwave or over a double boiler, stirring frequently to keep it smooth and lump-free—this will be your “bandages.”
Step 4: Decorate Your Mummy Cookies
Drizzle or pipe the melted chocolate diagonally back and forth across each cookie to mimic mummy wrappings. Don’t cover the entire surface; leave some spaces to give the effect of overlapping strips.
Step 5: Add Candy Eyes
Before the chocolate sets, gently press two candy eyes onto each cookie—it brings the mummies to life with a fun, spooky personality. Let the cookies sit until the chocolate is fully hardened.
Pro Tips for Making Mummy Cookies
- Use Parchment Paper: Prevents cookies and chocolate from sticking, making cleanup a breeze.
- Pipe with a Bag: Use a small piping bag or zip-top bag with a tiny corner cut for clean, controlled white chocolate lines.
- Room Temperature Dough: Allows even baking and smoother texture for decorating.
- Don’t Overbake: Keep cookies soft to complement the creamy chocolate “bandages.”
- Customize Eyes: Use edible markers to draw expressions if candy eyes are not available.
How to Serve Mummy Cookies
Garnishes
Sprinkle a little edible glitter or colored sugar on your cookies for an extra magical sparkle just before the chocolate sets.
Side Dishes
Pair your Mummy Cookies with a cold glass of milk, pumpkin-spiced latte, or a creamy hot chocolate for perfect autumn vibes.
Creative Ways to Present
Arrange the cookies on a black plate or a rustic wooden board with autumn leaves or Halloween-themed napkins for a festive display that invites compliments.
Make Ahead and Storage
Storing Leftovers
Keep your Mummy Cookies in an airtight container at room temperature for up to 4 days, ensuring they remain fresh and the chocolate decorations stay intact.
Freezing
You can freeze undecorated sugar cookies for up to 3 months and decorate after thawing, which helps keep the white chocolate fresh and shiny.
Reheating
Since these cookies are best enjoyed at room temperature, avoid reheating. Simply let frozen cookies thaw naturally to maintain their perfect texture and flavor.
FAQs
Can I make Mummy Cookies without candy eyes?
Absolutely! You can use small dots of melted chocolate or draw eyes with edible markers as a simple alternative.
Is white chocolate necessary for the mummy wrapping?
White chocolate or candy melts work best for their smooth texture and clean look, but melted frosting or royal icing can also create mummy wraps.
Can I use refrigerated cookie dough for this recipe?
Yes, refrigerated or store-bought sugar cookie dough works wonderfully and saves time, just ensure cookies are fully cooled before decorating.
Are Mummy Cookies kid-friendly?
Definitely! They’re easy to make together and decorating can be a fun Halloween craft for children.
How long do Mummy Cookies last?
Stored properly in an airtight container, these cookies keep fresh and tasty for up to 4 days at room temperature.
Final Thoughts
Give these Mummy Cookies a try the next time you want a quick, whimsical Halloween treat that everyone will adore. They’re as fun to make as they are to eat, and with just a few simple ingredients, you’ll have a batch of spook-tacular cookies that’ll delight any crowd. Happy baking and have a wonderfully festive Halloween!